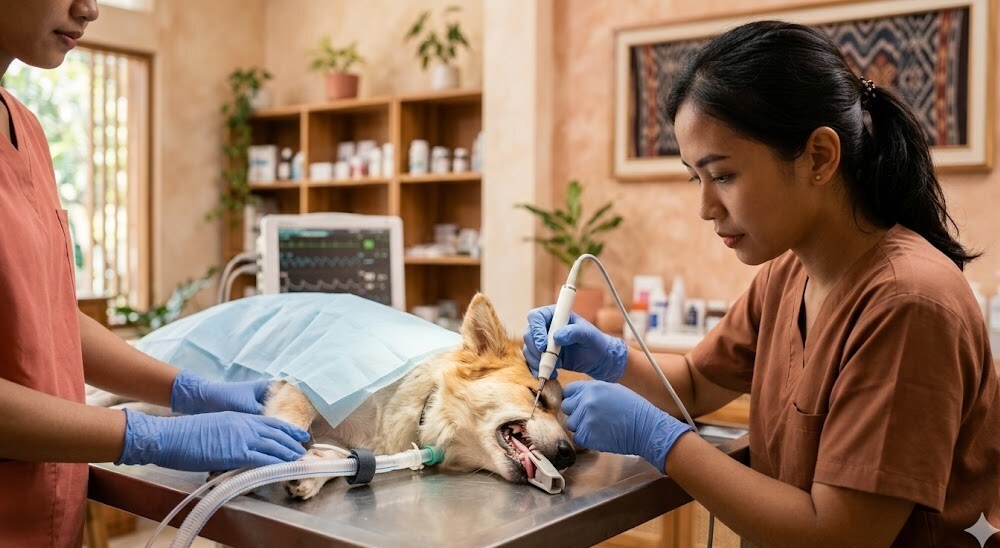
"My cat's ears are really dirty — I have to clean them every week, right, doc?" This question often comes into the Prabasavet WhatsApp chat, usually with a photo of an ear with black flecks. The short answer: no, a healthy cat actually does NOT need routine ear cleaning — a cat's ears are self-cleaning by design, and over-cleaning actually causes irritation.
But if there are specific signs (the cat scratches its ears constantly, head shakes, characteristic black flecks accumulating, a foul smell), that's a different signal — it could be ear mites, otitis externa, or a yeast infection that needs a vet evaluation before any at-home cleaning.
This article covers the anatomy of a cat's ear and why it's different from a human's, when ear cleaning is truly needed vs when it should be left alone, products that are safe vs DANGEROUS (hydrogen peroxide can damage the eardrum), the correct step-by-step technique, and when the condition has entered the territory of otitis that needs to see a vet.
Cat ear anatomy — why it's different from a human's
Before talking about cleaning technique, understand the structure first — because this is what makes many "common sense" procedures actually wrong.
- L-shaped ear canal — a cat's ear has an L-shaped (or J-shaped) canal. The vertical part descends from the pinna (ear flap), then turns 90 degrees to horizontal toward the eardrum (tympanic membrane). A human's ear canal is short and straight; a cat's is long and bent.
- The practical implication: debris lodged at the L-bend has trouble coming out on its own. But if we push from outside with a cotton bud, the debris is instead pushed deeper toward the eardrum (not expelled). This is why cotton buds are absolutely contraindicated for a cat's ear.
- Self-cleaning mechanism — a cat's ear has epithelial cells that naturally migrate from the inside out (epithelial migration), carrying skin flakes + cerumen toward the pinna. Add the head shake reflex when there is an irritant. This system is efficient for a healthy cat in a normal environment — which is why over-cleaning actually disturbs the natural mechanism.
- The eardrum (tympanic membrane) — a layer as thin as tissue paper that separates the ear canal from the middle ear. Once perforated (torn), the cat loses hearing on that side temporarily, and medication/fluid that enters the middle ear can trigger vestibular signs (head tilt, ataxia, nystagmus) until it heals.
When ear cleaning is needed — and when it should be left alone
This is the part most often misunderstood by new owners. It's not "ears = must be cleaned routinely." Here are pragmatic guidelines:
A HEALTHY cat with clean ears → DO NOT clean routinely
If the cat's ears look clean (pink-cream, no accumulated debris, no smell, the cat isn't scratching), leave them alone. No weekly cleaning needed, no "preventive" cotton bud. The self-cleaning mechanism works well. Over-cleaning actually:
- Removes the protective ceruminous layer (cerumen has a natural antibacterial function)
- Irritates the ear canal epithelium → predisposes to otitis
- Traumatizes the cat and makes it refuse ear handling in the future when it's genuinely needed
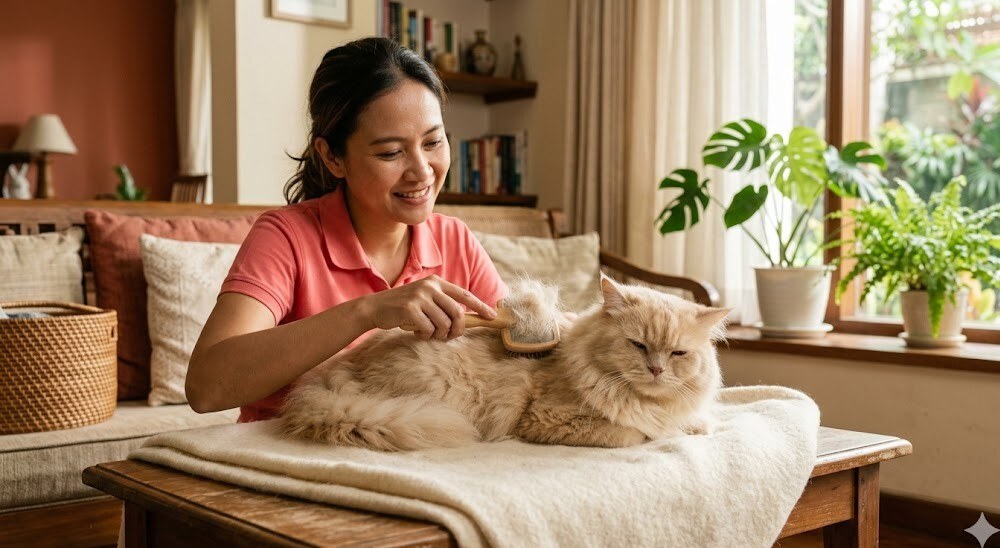
A HEALTHY cat with normal cerumen → wipe the outside only if needed
If there is a little light yellow-brown cerumen on the outer pinna area (the visible part), you may gently wipe it with damp cotton wool or a cotton pad — only the visible part, don't enter the ear canal. Frequency: only if needed, no routine schedule necessary.
If there are specific signs → consult a vet first, DO NOT just clean
The signs below are not an indication of "needing cleaning more often" — but an indication that there is a problem that needs to be diagnosed. Cleaning at home without a diagnosis can worsen the condition (e.g., aggressive cleaning on an already-perforated eardrum).
Signs of a problem with a cat's ear
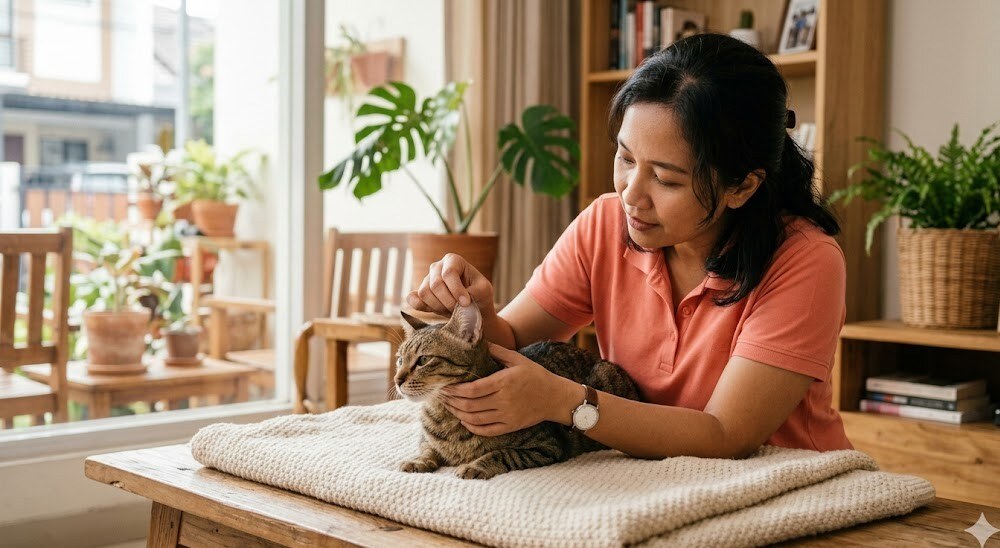
Check your cat's ears — lift the pinna gently, look inside (only as far as visible at the mouth of the vertical canal, don't poke):
- Repeated head shaking — the cat shakes its head several times a day, sometimes with a whimper
- Obsessive ear scratching — to the point of causing a wound on the pinna or in front of the ear
- Characteristic black "coffee grounds" flecks — dry black-to-dark-brown debris accumulating, with a texture like coffee powder → a strong indicator of ear mites (Otodectes cynotis), most common in young cats, outdoor cats, or cats newly adopted from a rescue/shelter
- Characteristic foul smell — a sour or yeasty smell coming out of the ear
- Redness / inflammation in the visible ear canal, or around the base of the ear
- Purulent discharge — yellowish/greenish fluid, sometimes mixed with blood
- Painful on touch — the cat pulls its head away or growls when the ear is touched lightly (very characteristic of advanced otitis)
- Head tilt — the head continuously tilted to one side → could indicate otitis media (middle ear) or vestibular involvement, an emergency, see a vet now
- Ataxia / nystagmus — impaired balance, eyes moving rhythmically → same as above, a vestibular emergency
Important note: "dirty ears" in a cat does not always mean the same thing. Black coffee-grounds flecks = ear mites (a parasite, needs systemic anti-parasite treatment). Moist/sticky brown flecks = could be yeast (Malassezia) or a bacterial infection. Yellow-green fluid = purulent bacterial infection. Each category has different treatment — at-home cleaning without a diagnosis = treating the symptom without the root cause, usually just "covering it up" briefly before it recurs.
⚠️ DO NOT use cotton buds — ever heard "up to the elbow, no deeper"?
For human ears there's an old saying, "cotton bud up to the elbow" — meaning don't insert it at all. For cats the rule is even stricter: do not use a cotton bud at all to clean inside a cat's ear canal. Wiping the outside (the visible pinna) with cotton wool or a cotton pad is fine. But entering the canal — never.
Why it's dangerous:
- Pushing debris deeper — because the ear canal is L-shaped, a cotton bud entering vertically pushes debris toward the bend and accumulates it there, near the eardrum. Cleaning becomes counterproductive — the condition worsens, not improves.
- Risk of perforating the eardrum — the cat suddenly head shakes or jumps while the cotton bud is in the canal → the cotton bud punctures the eardrum. A perforated eardrum causes temporary hearing loss, and ear cleaner that enters the middle ear triggers vestibular signs (head tilt, falling, nausea).
- Cotton fibers getting stuck — cotton fibers can come loose and be left inside the canal, becoming a foreign body that triggers chronic inflammation.
- Mucosal trauma — a cat's ear canal is lined with delicate, vascular skin. Hard friction from a cotton bud causes micro-trauma, an entry door for infection.
If the ear genuinely needs cleaning, use a liquid ear cleaner designed to be pumped into the canal with the flooding technique (see the step-by-step section below) — not a cotton bud being pushed in.
Ear cleaner products that are safe vs DANGEROUS
The safe ones — vet-formulated, pH-balanced ear cleaner
Choose a product designed specifically for animal ears, pH-balanced (around pH 6-7, close to the natural ear canal pH), without antibiotics/antifungals unless prescribed by a vet, and non-ototoxic (safe even if the eardrum status is unknown — some special formulas are safe even with a perforated eardrum, but confirm the label).
- Virbac Epi-Otic Advanced — the gold standard, often recommended by vets, containing salicylic acid + chlorhexidine digluconate as a mild antimicrobial, pH-balanced. Safe for routine cleaning of mild conditions.
- Virbac CleanAural — a pH-balanced alternative, for light maintenance.
- Vetericyn Plus Ear Rinse — basic saline-based, the most neutral, OK for sensitive cats that react to other formulas.
- TrizUltra + Keto (TrizEDTA + ketoconazole) — a combination for cats with recurrent Malassezia yeast infection (vet prescription only, not for routine prevention).
If imported products are hard to find in Indonesia, consult a vet — clinics usually stock professional ear cleaners that can be purchased for home use.
DO NOT use — ever heard the story of "using hydrogen peroxide to clean a cat's ear"?
Stop. This is a fatal misconception that still circulates often. Here is what you must NEVER use on a cat's ear:
- Hydrogen peroxide (H2O2) — OTOTOXIC, can damage the middle ear structures if the eardrum is perforated (which you might not know about). Plus it creates foam in the ear canal that actually irritates the sensitive canal skin. The "H2O2 is a wound disinfectant" myth does not apply to ears.
- Alcohol (rubbing alcohol, vodka, etc.) — severe stinging (imagine alcohol on an open wound in an inflamed ear), and aggressive drying that damages the canal's epithelial layer. The cat is traumatized for life after just one time.
- Human ear cleaner (Aquadeks, Vosol, etc.) — pH mismatch (too acidic for a cat), ingredients not tested for cats (human acetic acid concentrations can be an irritant for cats).
- White vinegar — once went viral on DIY forums. 5% acetic acid is too concentrated for a cat's ear, irritates the mucosa, and is not the right treatment for any problem.
- Plain water / human contact-lens saline — plain water has no antimicrobial effect and can actually trap moisture in the canal (yeast loves moist conditions). Contact-lens saline is OK in a pinch but not ideal.
- Mineral oil / baby oil — often suggested to "soften the debris." The problem: oil can't get out of the ear canal, gets trapped, and becomes a growth medium for bacteria/yeast. It's allowed for certain specific conditions per a vet's direction, but don't take it upon yourself.
- Any soap / shampoo — very irritant, wrong pH, not designed for inside the canal.
Bottom line: if you're not sure the product you have is safe, don't use it. It's better for the cat to wait for a vet consultation than to rush into cleaning with an agent that actually causes damage.
The correct step-by-step ear cleaning technique
Scenario: your cat has already been diagnosed by a vet (e.g., ear mites or mild otitis), the vet has prescribed an ear cleaner + systemic medication (selamectin for ear mites, etc.), and you've been asked to continue cleaning at home 1-2x per week as maintenance.
Preparation
- Warm the ear cleaner bottle in your hands for a few minutes (cold fluid entering the canal = the cat is startled, an aggressive head shake reflex). The ear cleaner should be lukewarm, not hot.
- Prepare a towel to wrap the cat (optional — a calm cat is fine without a wrap; a reactive cat must be wrapped so its paws don't knock the cleaner).
- Prepare a cotton pad / cotton wool (NOT a cotton bud) to wipe the outer ear.
- A safe place — usually your lap or on a towel on the floor. Not on a high table (the cat could fall when head shaking).
- A reward / treat on the side for after the session.
Step 1: Flooding the canal
Lift the pinna gently so the vertical canal opens straight. Hold the ear cleaner bottle near the canal opening (not inside — just at the mouth of the canal), and squeeze the bottle until the fluid flows in flooding the canal until full. The amount depends on the cat's size and the product recommendation — usually 1-3 mL per ear is enough.
Don't go drop-by-drop — flooding all at once is more effective at loosening debris along the canal.
Step 2: Massage the base of the ear (30 seconds)
Close the pinna gently, then massage the base of the ear (below the pinna, the area between the pinna and the jaw) with gentle circular motions for a full 30 seconds. You'll hear a liquid "squelching" sound inside — that's the sign the cleaner is working to dissolve the debris.
Don't skip this step. Without the massage, the cleaner just pools outside the canal and doesn't reach the L-bend.
Step 3: Let the cat head shake
Release the pinna, let the cat head shake naturally. This shake reflex expels debris + cleaner from the canal toward the pinna. This is the step that must NOT be skipped or replaced with a cotton bud. Head shaking can last 10-30 seconds, just let it go until the cat is satisfied.
Tip: stand back a little — fluid + debris will fly around. Wear clothes that are OK to get dirty, do it in an easy-to-clean area (tile floor > fabric sofa).
Step 4: Wipe the outer ear with a cotton pad
After the head shaking is done, wipe the pinna and the outer area (the visible part) with a cotton pad or cotton wool. DO NOT enter the canal. Just collect the debris that has already come out to the pinna.
Step 5: Reward + repeat on the other ear
Give a treat / praise. Pause for 1-2 minutes, then repeat for the other ear. Total session: 5-10 minutes for both ears.
Maintenance frequency
It depends on the condition you're treating and the vet's instructions. Generally: 1-2x per week during the treatment course (usually 2-4 weeks), then drop to as-needed once resolved. Don't continue it as a permanent routine once the condition is resolved — go back to "a healthy cat = don't clean routinely."
Ear mites (Otodectes cynotis) — the most common case
Ear mites are microscopic parasites that live in a cat's ear canal, feeding on skin debris + secretions. Characteristic: they create the very characteristic black coffee-grounds debris. The #1 cause of "dirty cat ears" in young cats + newly adopted cats + outdoor cats.
Transmission
- Direct cat-to-cat contact (most common)
- From a shelter / cattery with many cats
- From mother to kitten
- Dogs can get them too (but more rarely), and cross-species transmission is possible
Treatment
Ear mite treatment is not just topical cleaning — it needs a systemic antiparasitic effective against Otodectes:
- Selamectin (Revolution, Revolution Plus) — a spot-on topical applied once at the nape, effective for 1 month, kills ear mites + other parasites (fleas, some intestinal worms). Often the first-line choice because it's practical. Dosing and the repeat interval per the vet's direction.
- Fluralaner (Bravecto Plus for cats) — a long-acting chewable or topical combination, kills ear mites + fleas + ticks. A single dose is effective for 2 months.
- Moxidectin (Advocate / Advantage Multi) — an imidacloprid + moxidectin combination, monthly spot-on, effective against ear mites + other parasites.
- Ivermectin off-label — still used in some settings, but now rarely first-line because of the safer + more practical options above. Do not take it upon yourself to use cattle/dog ivermectin on a cat — the wrong dose triggers neurotoxicity.
Mandatory: treat all animals in the household, even those that appear to have no symptoms. Ear mites have a short life in the environment but are highly infectious between animals in one household. If only one cat is treated, the other cats become a reservoir and recurrence happens within a few weeks.
Cleaning the ear canal during the treatment course is still important to remove debris from dead mites + reduce residual inflammation — but cleaning alone without the systemic medication will not eradicate them.
Otitis externa — when to see a vet
Otitis externa = inflammation of the external ear canal. This is a diagnosis (a condition), not an etiology — the cause can be ear mites, yeast (Malassezia), bacteria (Pseudomonas, Staphylococcus), allergy, or a foreign body. A cat with otitis externa needs a vet evaluation before at-home cleaning, because:
- Swab cytology — the vet takes a debris sample, examines it under the microscope to identify ear mites, yeast, bacteria (cocci vs rods), or a mix. Treatment differs completely per category.
- Checking the eardrum status — if the eardrum is perforated, some ear cleaners + topical medications are contraindicated (ototoxic). The vet uses an otoscope for visualization.
- Checking the primary cause — recurrent otitis is usually secondary to an underlying condition (atopic allergy, food allergy, an anatomical issue like inflammatory polyps, hypothyroidism). Treating the ear without addressing the primary cause = recurrence every time.
Signs of otitis externa that need an immediate vet evaluation (don't just clean):
- The ear is very painful when touched (the cat yelps / pulls its head away / growls)
- Purulent yellow-green or bloody discharge
- A swollen pinna or a lump (aural hematoma — a collection of blood in the pinna from excessive head shaking, requires drainage)
- Head tilt, ataxia, or nystagmus (otitis media/interna, a vestibular emergency)
- A severely foul smell
- No response to a pH-balanced cleaner after a few days, or it worsens
Controlling the condition (anti-recurrence)
- Treat all animals in the household if it's ear mites — non-negotiable
- Routine monthly antiparasitics if the cat has outdoor access or new cats often enter the house — a selamectin/moxidectin/fluralaner spot-on on a regular schedule
- Address allergy if otitis is recurrent — it can be atopic (environmental, common), food allergy (rare but possible), get a vet evaluation
- DO NOT clean preventively if the ears are already clean + the cat is healthy — let the self-cleaning mechanism work
- An indoor-only cat? Still at risk if there is contact with other animals (boarding, grooming, vet visits, a newly adopted cat) — regular antiparasitics are still recommended
Cat ear cleaning FAQ
My cat clearly scratches its ears but the ears look clean — what do I do?
There are a few possibilities: early-stage ear mites (debris hasn't accumulated much yet), an allergy that manifests as itchy ears, or a skin problem around the ear (not inside the canal). Don't clean right away — get a vet evaluation for a swab cytology first, then targeted treatment.
When may I use a cotton pad to wipe the outside?
After ear cleaner flooding + head shaking, to wipe the debris that has already come out to the pinna. Only on the VISIBLE area (the pinna, the mouth of the vertical canal). You may not push it into the canal. A cotton bud never, at any stage.
How long does ear mite treatment take to clear up?
A selamectin/moxidectin/fluralaner spot-on usually takes 1-2 applications at the interval per the product (generally 1 month). Maintenance cleaning continues for 2-4 weeks to remove residual debris + reduce inflammation. A vet recheck after the course confirms the mites are eradicated + the canal has recovered. Don't stop treatment just because symptoms start to improve in week 1 — the mite's life cycle needs a full course to break.
My cat really resists all ear handling — what do I do?
A gradual approach: start from touching the face → touching the base of the ear → lifting the pinna briefly → trying it with a reward (a tasty treat) at each progress. A few days to 1-2 weeks of desensitization before real cleaning. If it really can't be handled (a high-fear cat), consult a vet — light sedation at the clinic may be needed for the diagnostic + initial cleaning, then maintenance at home with a gradual technique.
If cotton buds are completely off-limits, what do I do if hard debris is stuck on the outer pinna?
The outer pinna (the VISIBLE part) can be done with a cotton pad / cotton wool dampened with ear cleaner. Soften the debris, then wipe. Use a safe angle so that if the cat suddenly moves, there's no risk of perforating anything. What's absolutely forbidden = a cotton bud entering the vertical canal.
My 8-week-old kitten has black ears — can I treat ear mites at home right away?
It's best to consult a vet first to confirm the diagnosis (cytology) + check the body weight for the correct antiparasitic dosing. Many antiparasitics have a minimum weight or age for safety. Besides that, a young kitten sometimes has other coexisting problems (GI parasites, malnutrition) that need to be addressed together.
Summary
A cat's ears are designed to be self-cleaning — a healthy cat with clean ears does NOT need routine ear cleaning. Over-cleaning actually disturbs the natural mechanism and predisposes to otitis. Cleaning is only needed if there is a specific problem already diagnosed by a vet (ear mites, otitis externa, etc.), using vet-formulated pH-balanced products (Epi-Otic, CleanAural), with the flooding + massage + let the cat head shake + wipe the outer ear technique — NOT a cotton bud inside the canal.
The most critical things to remember:
- Clean ears + a healthy cat = don't clean routinely, leave them
- A cotton bud NEVER enters the canal — it pushes debris in + risks perforating the eardrum
- Hydrogen peroxide + alcohol + human ear cleaner = ototoxic / severely irritant, don't use them
- Coffee-grounds black debris = ear mites, needs systemic antiparasitics (selamectin/fluralaner), treat all animals in the household
- Head tilt / ataxia / nystagmus = vestibular emergency, see a vet now
- Recurrent otitis = there is a primary cause (allergy, anatomy), get a vet evaluation, not more frequent cleaning
Would you like a consultation about your cat's ear condition or need an in-home evaluation (swab cytology, choosing the right product)? Contact us on WhatsApp — send photos of the ear (lift the pinna, photograph the visible canal), the signs you see (head shaking, scratching, etc.), the cat's age, and whether there are other animals in the household. The Prabasavet team will help with an initial evaluation and recommend next steps.
Read also: Dental brushing for cats and dogs: the safe way, frequency, and which paste to use, Claw trimming for cats and dogs: the safe way, tools, and avoiding injury, A kitten adoption checklist for new owners, Complete pet care guide.
Medical references used in this article
This article was prepared with reference to the following sources, verified per clinical statement:
- ACVD (American College of Veterinary Dermatology) — guidelines for the approach to otitis externa in cats, evaluation of primary vs secondary cause, the rationale for swab cytology before topical treatment
- Harvey RG, Paterson S. Otitis Externa: An Essential Guide to Diagnosis and Treatment — cat ear canal anatomy, cleaning techniques, referral indications
- BSAVA Manual of Feline Practice 2e — the chapter on otitis in cats, Otodectes ear mite treatment, contraindications of ototoxic agents
- ISFM (International Society of Feline Medicine) — guidelines for cat-friendly handling for ear procedures, the approach to a fearful cat, when to refer to a clinic
- Plumb's Veterinary Drug Handbook 7e — monographs on selamectin, fluralaner, moxidectin (cat dosing, contraindications, adverse effects, dosing intervals)
- Greene CE. Infectious Diseases of the Dog and Cat — the chapter on Otodectes cynotis epidemiology, host range, transmission
This article is a general guide based on the international guidelines of ACVD, BSAVA, ISFM, and standard veterinary textbooks. For an evaluation specific to your cat's ear condition + choosing the right product, consulting a veterinarian is the right step.